

When to use it?
Getting plenty of traffic to your product pages but not seeing the conversions you’d expect? Traditional approaches—like manually editing product descriptions or running ad-hoc copy tests—can help, but they’re time-consuming and impossible to scale across a large catalog. That’s where the Smart Product Page Optimizer comes in:
More than manual tweaks:
Instead of rewriting product copy one page at a time, the Smart Product Page Optimizer uses AI to instantly generate multiple optimized variations—taglines, summaries, benefit lists, and more.
Inspire with better content:
Engage visitors with clear, benefit-focused messaging that helps them quickly understand why your product is right for them, without overwhelming them with long descriptions or technical jargon.
Continuous optimization:
The built-in A/B testing engine automatically identifies which versions perform best and rolls out the winners across your pages—no manual monitoring required.
How does it work?
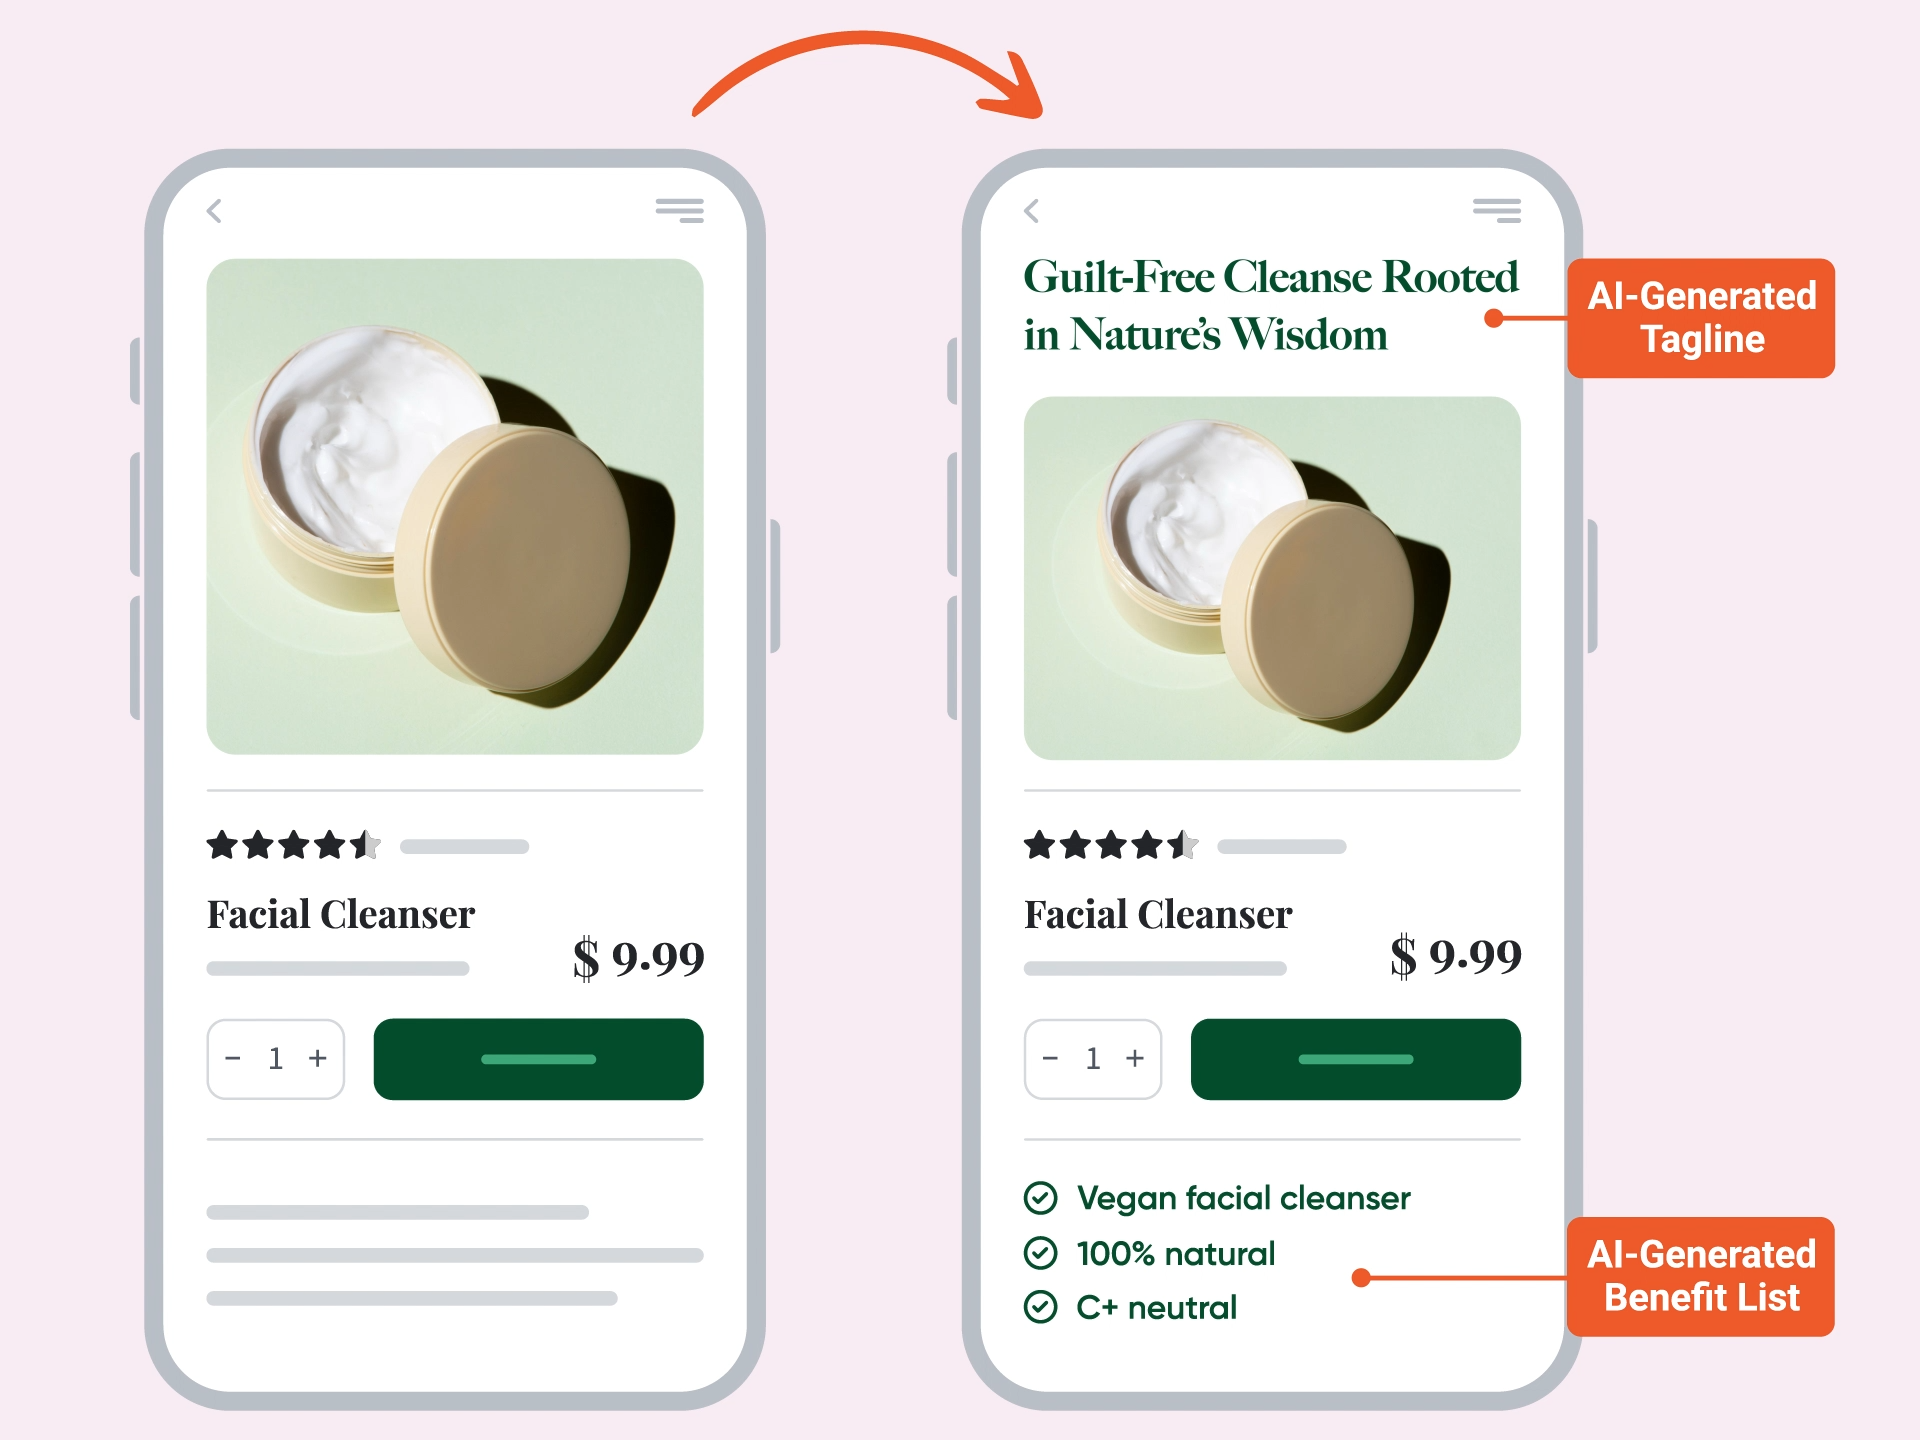
The Smart Product Page Optimizer enhances your product pages by generating and testing AI-powered content tailored to each product. This includes:
- AI-generated taglines and subheadlines
- AI-written benefit lists, summaries, and descriptions
- AI-based A/B testing to continuously improve performance
By optimizing every key text element at scale, you can significantly boost engagement and conversions across your entire product catalog.

How to set it up?
Step 0: Sign up for your OptiMonk AI free trial
The Smart Product Page Optimizer uses AI to match your customers with products they'll love. To access this feature, you need OptiMonk AI.
Here’s how to get OptiMonk AI:
- Book a quick demo call with our team.
- Meet with the team to help you get set up.
- Your free trial starts as soon as you launch your first campaign.
Book your OptiMonk AI demo here —>
We’ll assist you with the setup as part of your OptiMonk AI free trial.
Step 1: Generating the AI variables
Use AI to create new titles, descriptions, and other intelligent elements for your product pages that capture your audience’s attention and improve conversion rates.
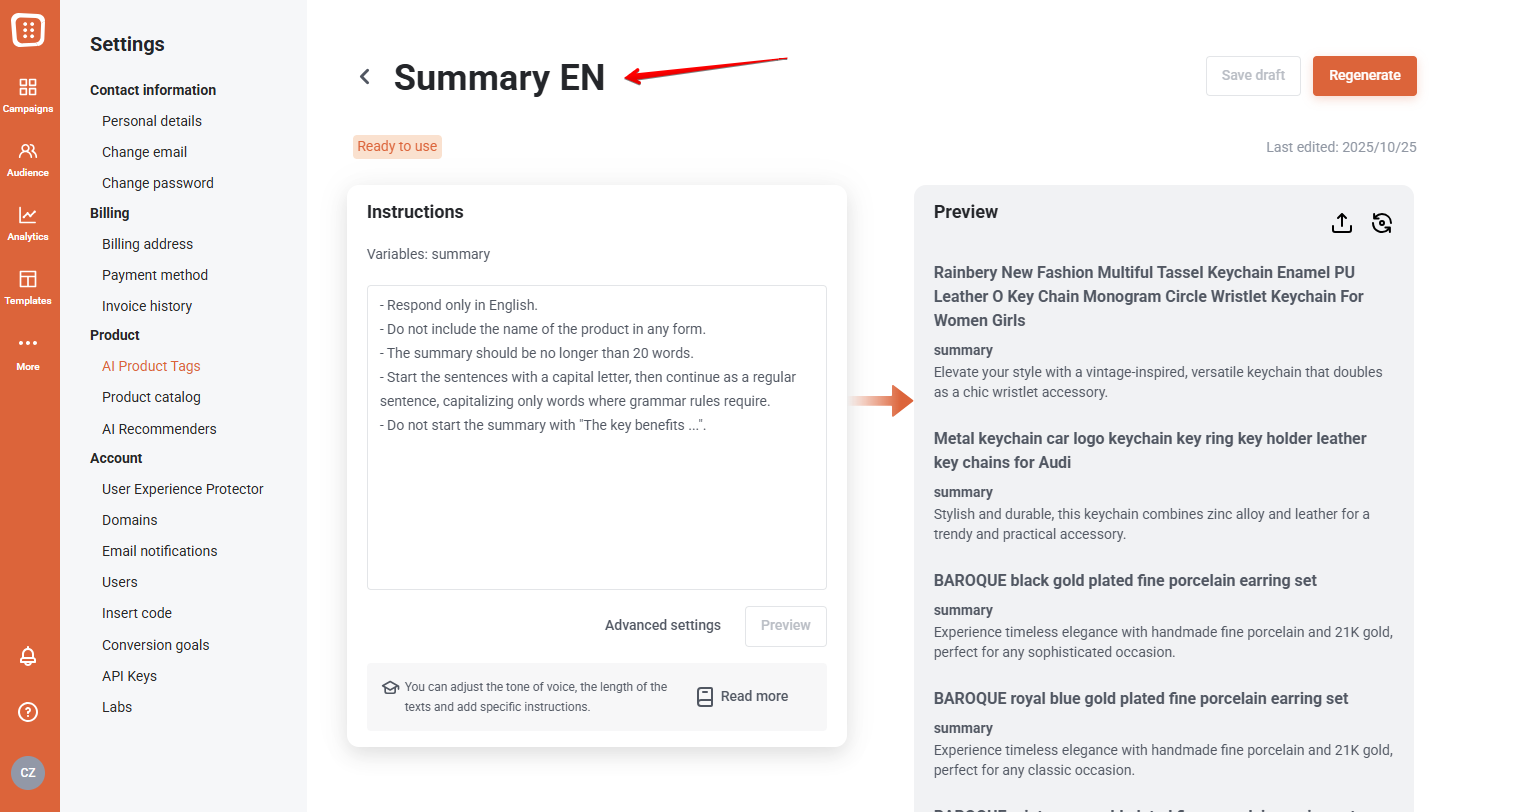
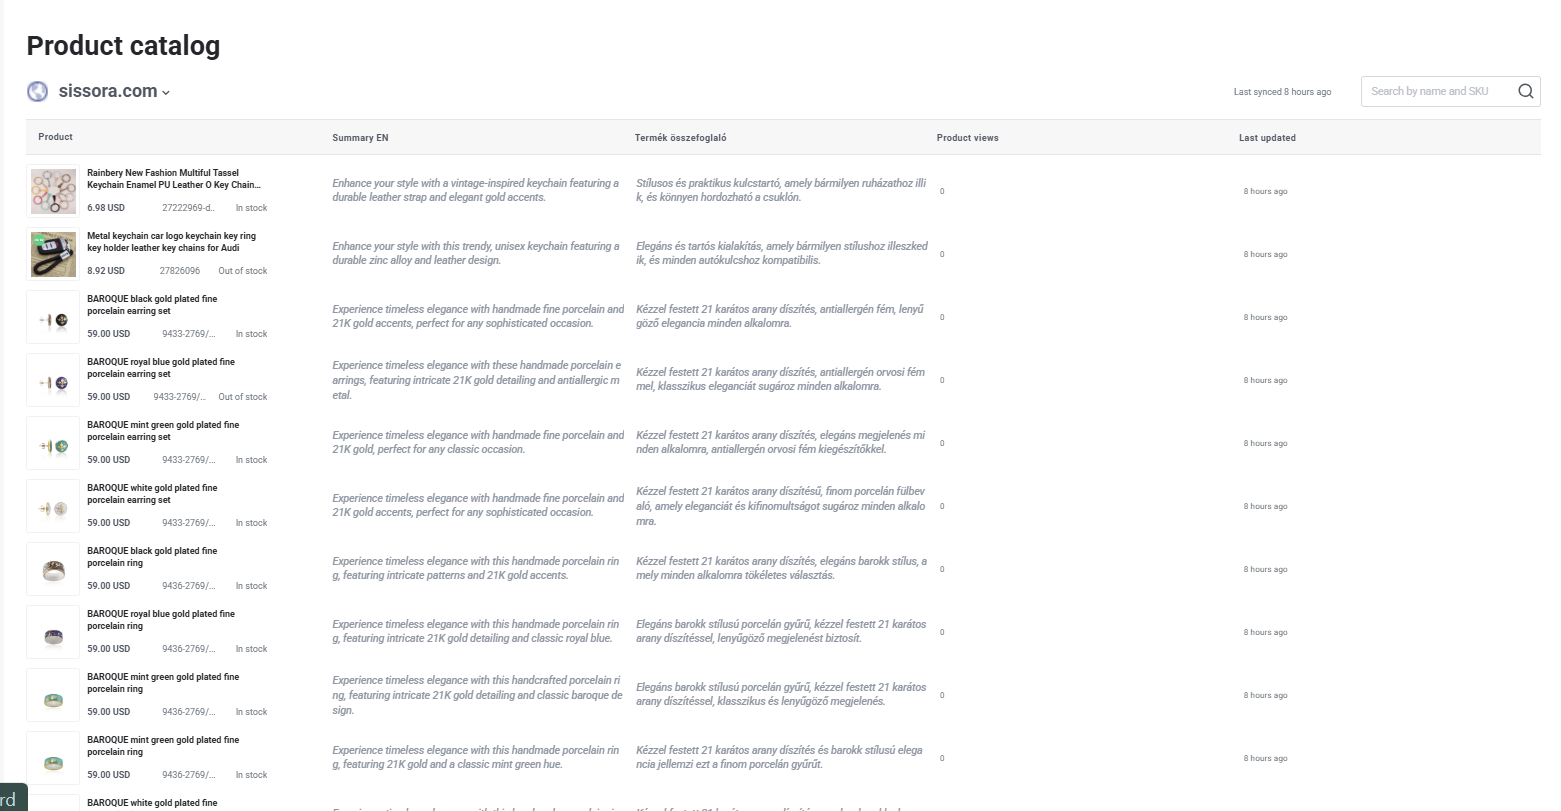
Step 2: Reviewing the AI variables
Review and manage AI-generated product copy and recommendations in the Product Catalog. Edit individual products or entire AI tags as needed to ensure your messaging and suggestions are ready for your campaign.
Step 3: Create an optimization campaign and customize your setup After generating your AI product copy, create a new Optimize a website → A/B Test campaign, select your domain, and navigate to the product page you want to improve. Once there, switch to Edit mode to start placing your Smart elements.
Step 4: Add your smart elements
To insert AI-personalized headlines or subheadlines, simply click on the area where you want the text to appear and select Insert smart element. You’ll see all available AI variables listed—choose the one you’d like to place.
In this example, we added a short summary to optimize the product pages.

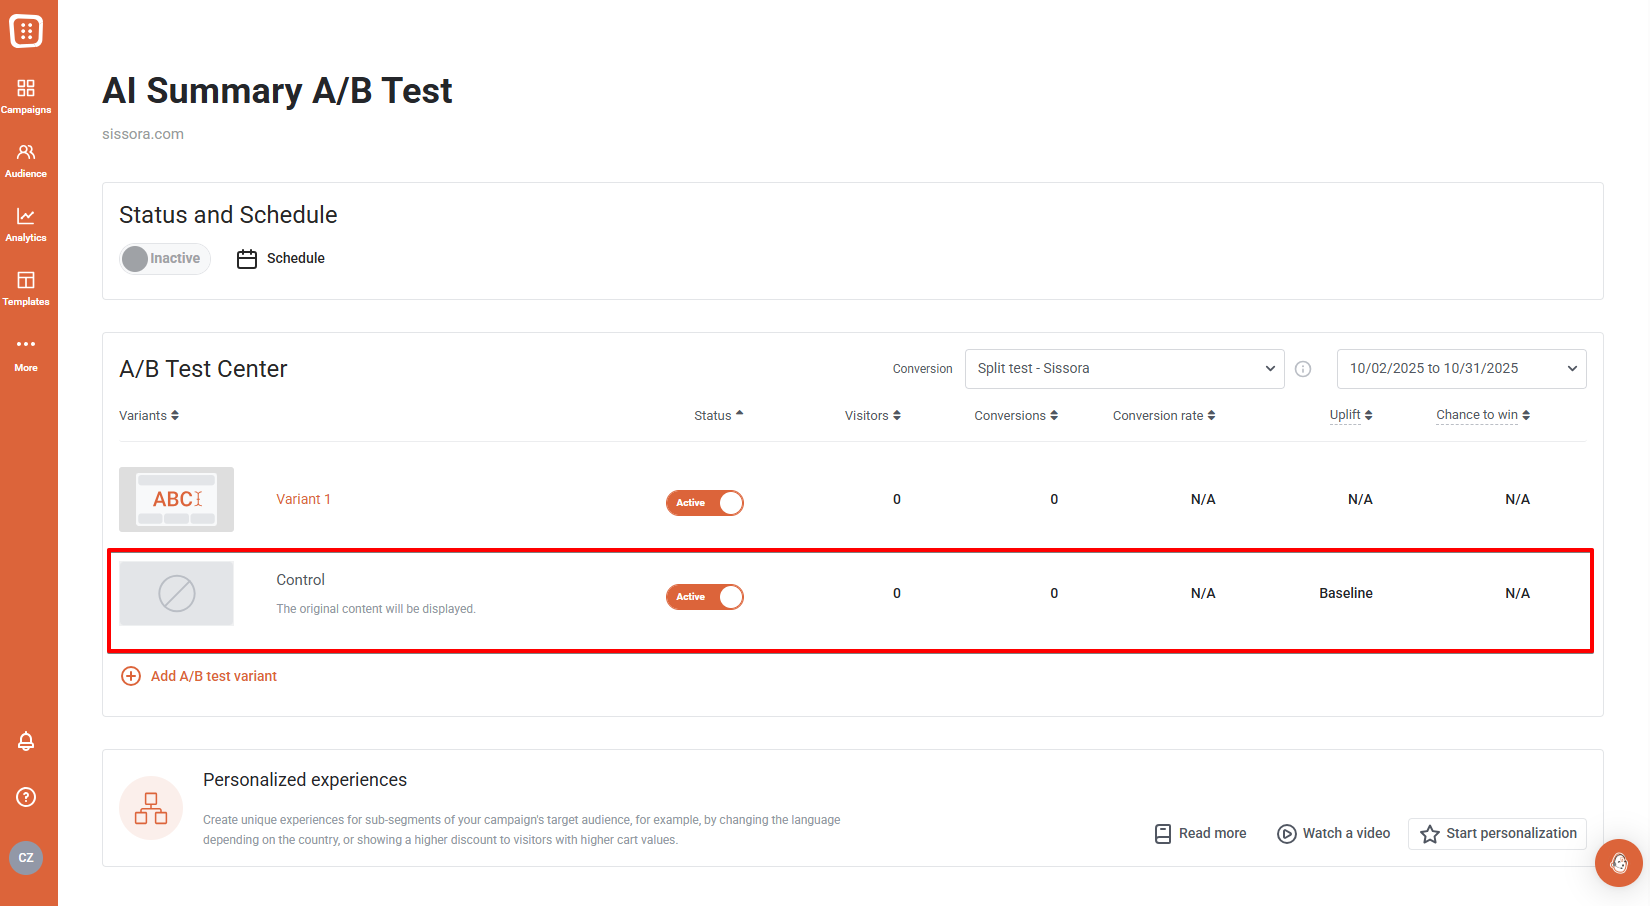
Step 5: Add a Control Variant
Once you've finalized your campaign, add a Control variant alongside your AI-powered solution. This will allow for an accurate comparison of results. Additionally, if you're interested, you can add further variants as well.
Step 6: Launch your campaign & watch your results grow
Once our AI generates the new elements for you, watch the magic unfold as your automated product recommendation campaign kicks off. Effortlessly track the growth of your conversions while you enjoy the fruits of automated success. Sit back, relax, and let the numbers speak for themselves.
Curious about more AI solutions?
Learn how AI can revolutionize your visitor experience with personalized interactions and higher conversion rates, all while significantly reducing manual labor.